Michigan System Settings Maintenance
Human Resources > State Requirements > MI > System Settings Maintenance
This page contains four tabs: MERS, MERS Defined Benefit, Retirement and ORS.
The settings on this page are used to pull the hours worked, gross, employer amount, mandatory amount, voluntary amount and loan amounts for the Michigan MERS Report.
Deductions and Benefits
For each applicable deduction and benefit, select the Type: Employer Contribution, Mandatory Employee Contribution or Voluntary Employee Contribution.
Loan Payments
Select all the deductions that are loan payments.
Excluded Hours
By default, the report includes all hours codes. Select the hours codes that should not be reported.
Gross Hours
Select all hours codes that should count toward the gross hours on the report.
The Michigan MERS requires the setup of two user-defined fields. These fields display on the Employment tab of Workforce Administration:
- Navigate to Maintenance > new world ERP Suite > Security > User-Defined Fields.
- From the Select a Record Type dropdown, select Employee Employment.
- Click OK. The User-Defined Fields Maintenance-Employee Employment page displays with the Attributes tab selected.
- Click New. The Add User-Defined Field Attribute dialog displays.
- In the Name field, type MI MERS Plan Number.
- In the Data Type field, select Text.
- In the Maximum Length field, type 6.
- Click OK. The MI MERS Plan Number field should display on the User-Defined Fields Maintenance-Employee Employment page and the Workforce Employment tab.
- Click New. The User-Defined Fields dialog displays.
- In the Name field, type MI MERS Eligibility Date.
- In the Data Type field, select Date/Time.
- Click OK. The MI MERS Eligibility Date field should display on the User-Defined List page.
- Navigate to Maintenance > new world ERP Suite > System > Validation Set List.
- Select Set Number1, Validation Set Alternate Usage Type.
- Click Values. The Validation Set Alternate Usage Type page displays.
- Click New. The Validation Set Value page displays.
- In the Value field, type MI MERS.
- In the Description field, type Michigan MERS (or any description meaningful to you).
- Click Save. The MI MERS validation set value should display on the Validation Set Alternate Usage Type page.
- Navigate to Maintenance > new world ERP Suite > System > Validation Sets > Validation Set List.
- Select Set Number39, Employee Status.
- Click Values. The Validation Set Values List-39 Employee Status page displays.
- Select the row corresponding with active status.
- Click Alternates. The Alternate Value List for active status displays.
- Click New. The Alternate Value dialog displays.
- In the Usage Type field, select MI MERS.
- In the Value field, type A.
- In the Description field, type Active (or any description meaningful to you).
- Click OK.
-
Repeat the steps above to create alternate values for the following statuses: inactive, terminated and rehire. The alternate value for inactive should be I, for terminated T and for rehire Rehire.
Note: If Rehire is used, the Employment Effective Date is used as the Rehire Date.
This tab contains Deductions, Benefits and Excluded Hours sub-tabs.
Deduction and benefit codes that have been set up for MERS Defined Benefit display in the grids on the Deductions and Benefits tabs, and the corresponding Type columns are populated with pre-tax designations.
Before running the Michigan MERS Defined Benefit Plan Report, make sure each deduction and benefit is mapped appropriately as Pre-Tax or Post-Tax.
To add or change a designation, select it from the Type drop-down.
Note: Deductions and benefits previously configured as user-defined fields (UDFs) have been moved into system settings.
You also have the option to map deductions and benefits to Bargaining Units. If you choose to run the Michigan Defined Benefit Plan Report with Bargaining Units selected as the Group Report by option, the report output groups employees under the bargaining units to which their deductions and benefits are mapped.
Note: Grouping the report by bargaining units does not affect the layout of the transmittal file, which is always grouped by employee.
On the Excluded Hours tab, select the hours codes that should not be reported.
Use the Retirement tab to set up and maintain the reporting values used consistently in creating your Empower retirement data. Setup includes reporting year, wage mappings, contribution mappings and loan payment selection.
Michigan retirement reporting requires the setup of six user-defined fields. These fields display on the Employment tab of Workforce Administration:
- Navigate to Maintenance > new world ERP Suite > Security > User-Defined Fields.
- From the Select a Record Type dropdown, select Employee Employment.
- Click OK. The User-Defined Fields Maintenance-Employee Employment page displays with the Attributes tab selected.
- Click New. The Add User-Defined Field Attribute dialog displays.
- In the Name field, type MI Retirement Eligibility Code.
- From the Data Type dropdown, select Check Box.
- Click OK. The MI Retirement Eligibility Code checkbox should display on the User-Defined Fields Maintenance-Employee Employment page and the Workforce Employment tab.
-
Repeat steps 4-7 for the following 5 remaining fields:
MI Retirement Participation Date: Data Type = Date/Time.
MI Retirement Plan Number: Data Type = Text, Maximum Length = 13.
MI Rehire Date: Data Type = Date/Time.
MI Retirement Termination Reason: Data Type = Validation Set, Validation Set = Michigan Retirement Termination Reason Code.
MI Retirement Transfer Flag: Data Type = Check Box.
The Retirement tab is segmented into five sub-tabs: General, Wages, Deductions, Benefits and Loan Payments. You may click Save after selections have been made on each tab, or wait until selections have been made on all tabs.
General
The General tab contains the reporting year that should be used each time this report is run:
| Field | Description |
|---|---|
| Reporting Year Start Date | Reporting year date range. |
| Reporting Year End Date |
Wages
Use the Wages tab to map the ORS wage codes to the plans and wage types that pertain to the reported hours codes for retirement system members.
To map an hours code to a plan or wage type, double-click the appropriate cell in the Plan or Type column, select from the drop-down and click Save:
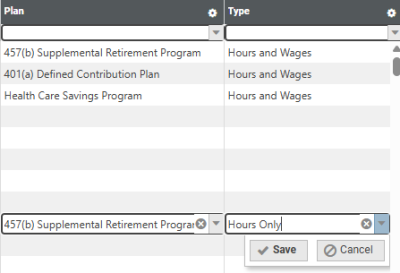
Selections on the Plan and wage Type drop-downs come from validation sets 709 (Michigan Retirement Plan) and 713 (Michigan Retirement Wage Type), respectively.
Deductions
Use this tab to map the deduction codes to the retirement plans and contribution types that sum up what the retirement system members are contributing to retirement.
Selections on the retirement Plan and contribution Type drop-downs come from validation sets 709 (Michigan Retirement Plan) and 710 (Michigan Retirement Contribution Type), respectively.
Benefits
Use this tab to map the benefit codes to the retirement plans and contribution types that sum up what the employer is contributing to retirement.
Selections on the retirement Plan and contribution Type drop-downs come from validation sets 709 (Michigan Retirement Plan) and 710 (Michigan Retirement Contribution Type), respectively.
Loan Payments
Use this tab to select the loan payment deductions to be included in reporting.
Retirement List
To navigate to the Michigan Retirement List page, click the Retirement List button at the bottom of any Retirement sub-tab.
Use the ORS tab to set up and maintain the reporting values used consistently in creating your retirement data. Setup includes company information, wage mappings and contribution mappings.
Note: Access to this feature requires separate licensing.
The tab is segmented into four sub-tabs: General, Wages, Deductions and Benefits. You may click Save after selections have been made on each tab, or wait until selections have been made on all tabs.
General
The General tab contains the fields that define company-level information that should be used each time this report is run:
| Field | Description |
|---|---|
| Organization Code | Five-digit organization number. The first four digits are the number assigned to the individual reporting unit. These digits should be followed by a zero (0). |
| Organization Name | Name of the reporting unit. |
| Service Center Code | Five-digit code of the service center that prepared the file, if applicable. |
| Service Center Name | Name of the service center that prepared the file, if applicable. |
Wages
Use the Wages tab to map the ORS wage codes to the hours codes that pertain to the reported wage codes for retirement system members.
To map a wage code to an hours code, double-click the appropriate cell in the Wage Code column, select the code from the drop-down and click Save:
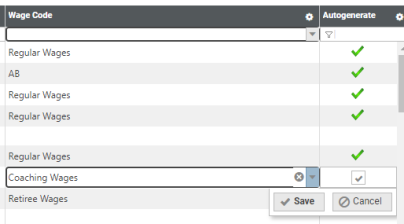
Selections on the Wage Code drop-down come from validation set 656 (Michigan ORS Wage Code).
The wages for each hours code with the corresponding cell in the Autogenerate column selected are reported on the auto-generated DTL4 record. (See Michigan ORS Auto-Generate DTL4 Records.)
To select an hours code for the auto-generate process, double-click the cell in the Autogenerate column, select the checkbox and click Save:
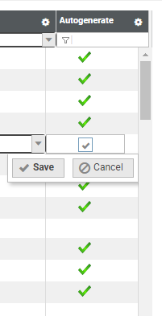
For employees with multiple hours codes selected, the sum of the hours code wages is reported on the DTL4.
Deductions
Use this tab to map the deduction codes to the contribution types that sum up what the retirement system members are contributing to retirement.
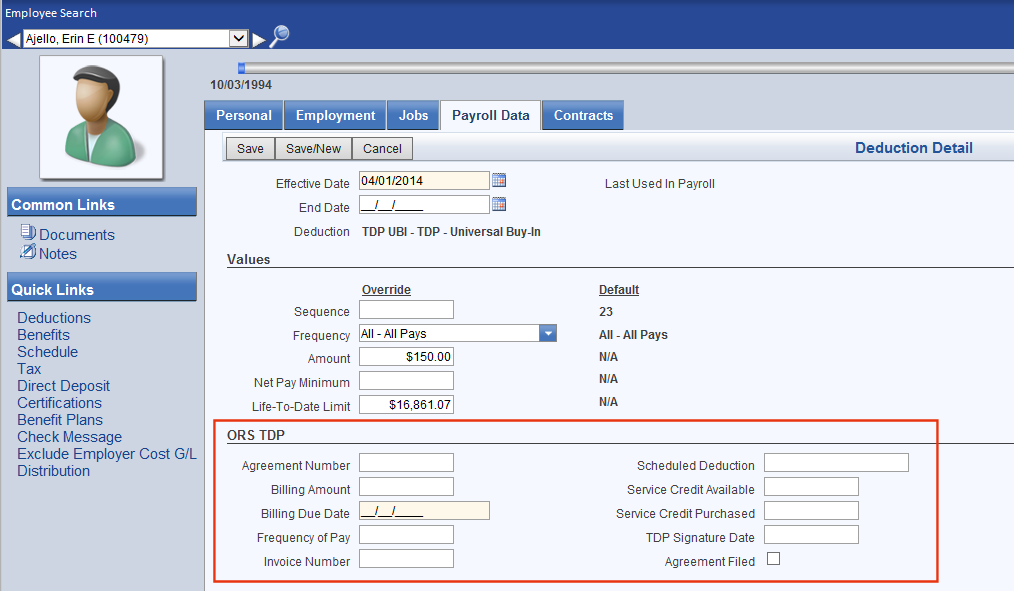
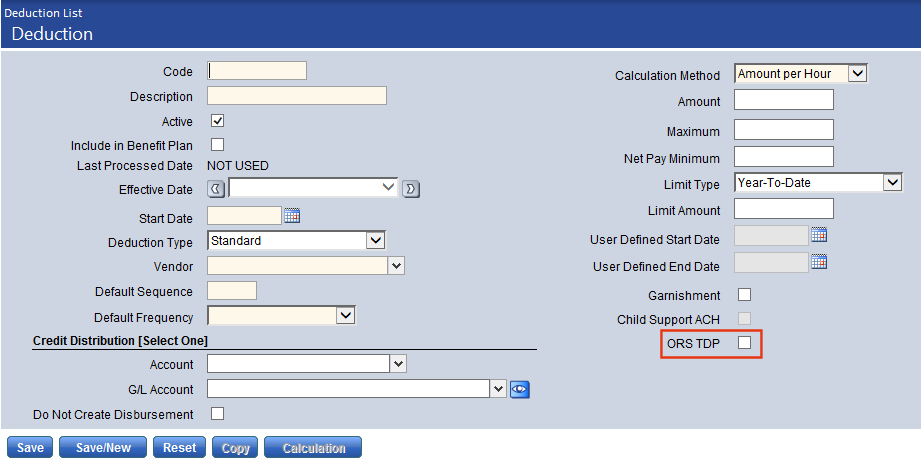
Note: Tax-deferred payment (TDP) entries are maintained in an employee's ![]() Deduction Detail section of Workforce if the
Deduction Detail section of Workforce if the ![]() ORS TDP checkbox has been selected on the corresponding deduction in Maintenance. The ORS report will pull in TDP deduction amounts automatically according to what deductions have been identified as ORS TDP deductions.
ORS TDP checkbox has been selected on the corresponding deduction in Maintenance. The ORS report will pull in TDP deduction amounts automatically according to what deductions have been identified as ORS TDP deductions.
Benefits
Use this tab to map the benefit codes to the contribution types that sum up what the employer is contributing to retirement.
ORS List
To navigate to the Michigan ORS List page, click the ORS List button at the bottom of any ORS sub-tab on the Michigan System Settings Maintenance page.
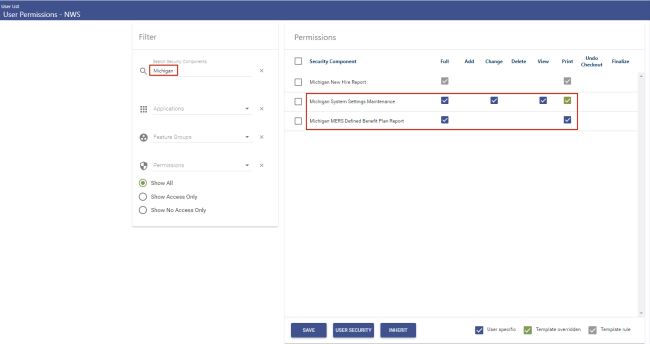
To give a user access to the Michigan System Settings Maintenance and Michigan MERS Defined Benefit Plan Report pages, follow these steps:
- Navigate to Maintenance > new world ERP Suite > Security > Users.
- Search for and select the user.
- Click Permissions.
-
In the Filter panel, type Michigan in the Search Security Components field. The Permissions panel reloads to show only the Michigan security components:
- Select the appropriate permissions for the user.
- Click Save.
- For the permissions to take effect, the user must log off and log back on.
